Request self-tapes with e-casting
You can ask an applicant to record a self-tape without booking an audition. Each role has an e-casting form: a brief, the questions you want answered, and the photos and videos you need. When you send an applicant a request, FilmKit emails them a private link to that form. When they submit, you read their answers, watch the tapes, and leave feedback in the project.
FilmKit sends the request to the email address saved on the applicant's submission, so the applicant must have one.
Build a role's e-casting form
Every request you send for a role uses the role's form, so you build it once. Your casting team can edit the form together, and everyone sees changes as they happen.
- In a project, click Casting in the sidebar, then click a call.
- Under E-casting form, click Edit form.
If the form is empty, click Add headshot and self-tape to start with a required headshot and a required self-tape video. - To add a block, click one of the buttons below the form:
Block What the applicant sees Text Formatted text you write, such as the brief or a scene description. Short answer A question with a one-line answer. Long answer A question with a multi-line answer. Photo A photo to upload or capture (up to five per form). Video A video to upload or record (up to two per form). - For each question, photo, or video, enter a Title and any Help text. For photos and videos, add Technical requirements, such as framing, length, or lighting.
- Select Required for anything the applicant must complete before they can submit.
- To keep an answer on file, choose a contact detail under Save to contact, such as Email, Phone, City, or Emergency contact phone. For a photo, choose Profile photo.
When you accept the applicant, FilmKit copies their answer to the contact it creates for them. Each contact detail can be linked to one field. - To change the order, click the up and down arrows on a block. To remove a block, click its trash icon.
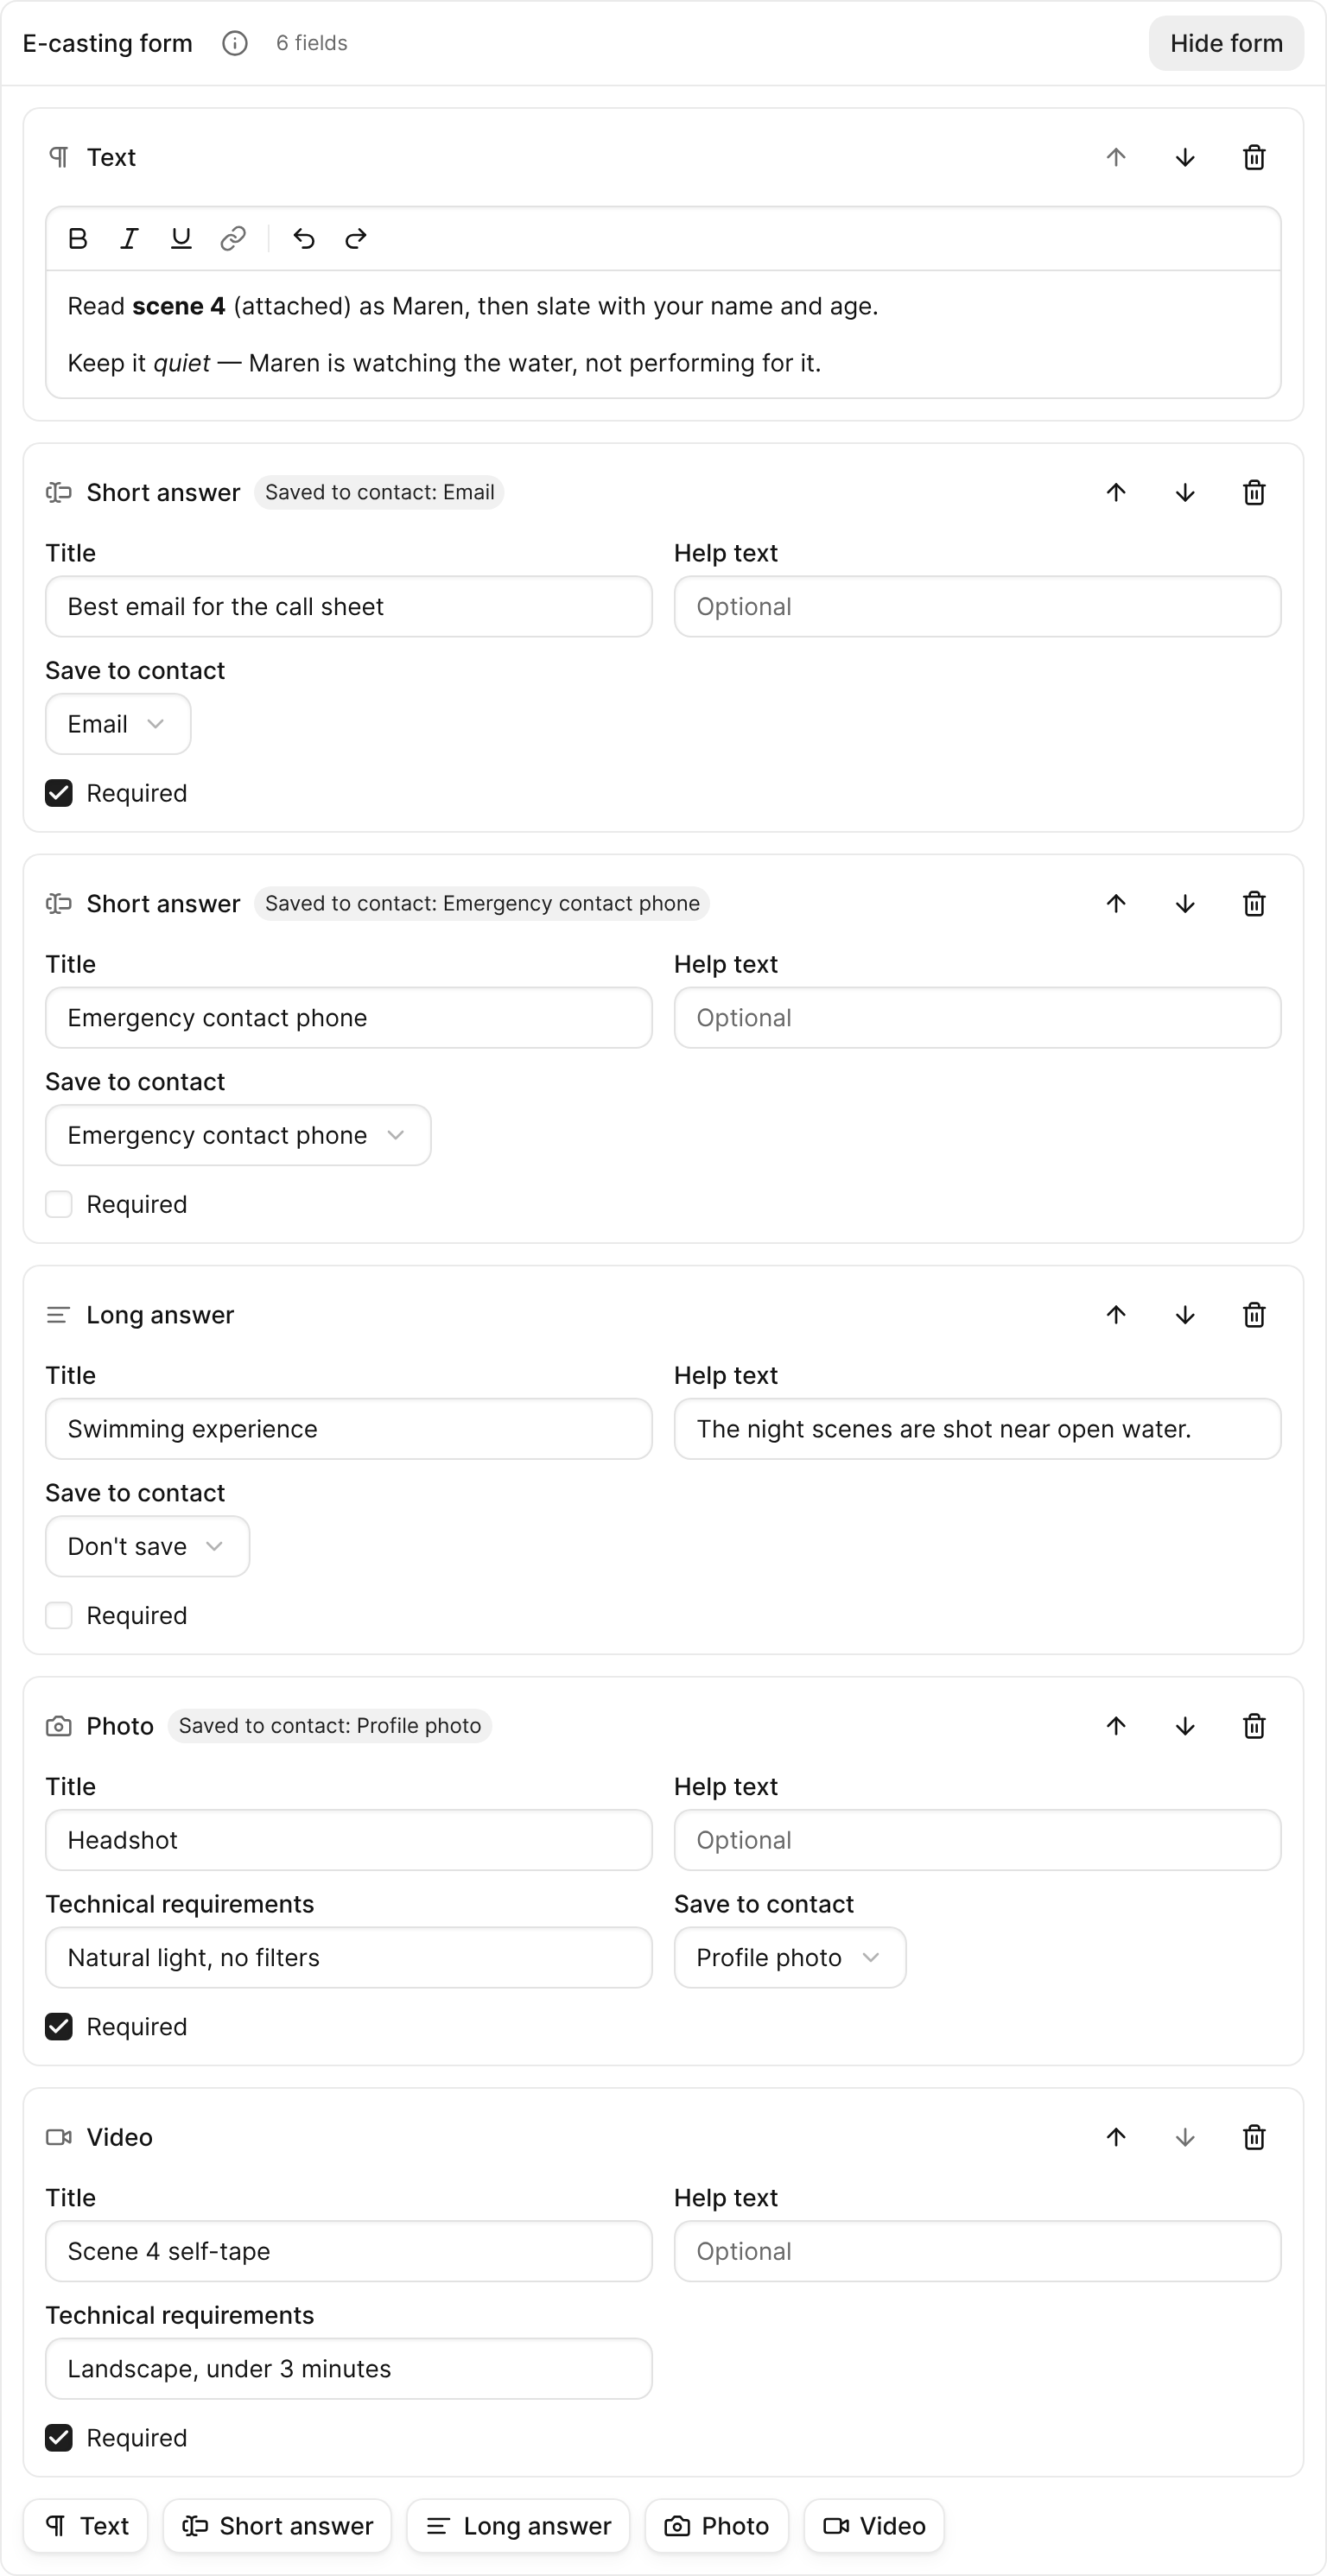
A role's e-casting form with a text block, short and long answers linked to contact details, and photo and video fields.

Requests you already sent keep the form they were sent with. When you duplicate a call, its form is copied too. A connected AI client or the project assistant can also build and edit the form for you; see Connect your AI.
Send an e-casting request
- In the call, find the applicant's row and click .
- In the Send e-casting request dialog, edit the Instructions. They're the email message and appear at the top of the form.
- Choose a Due date.
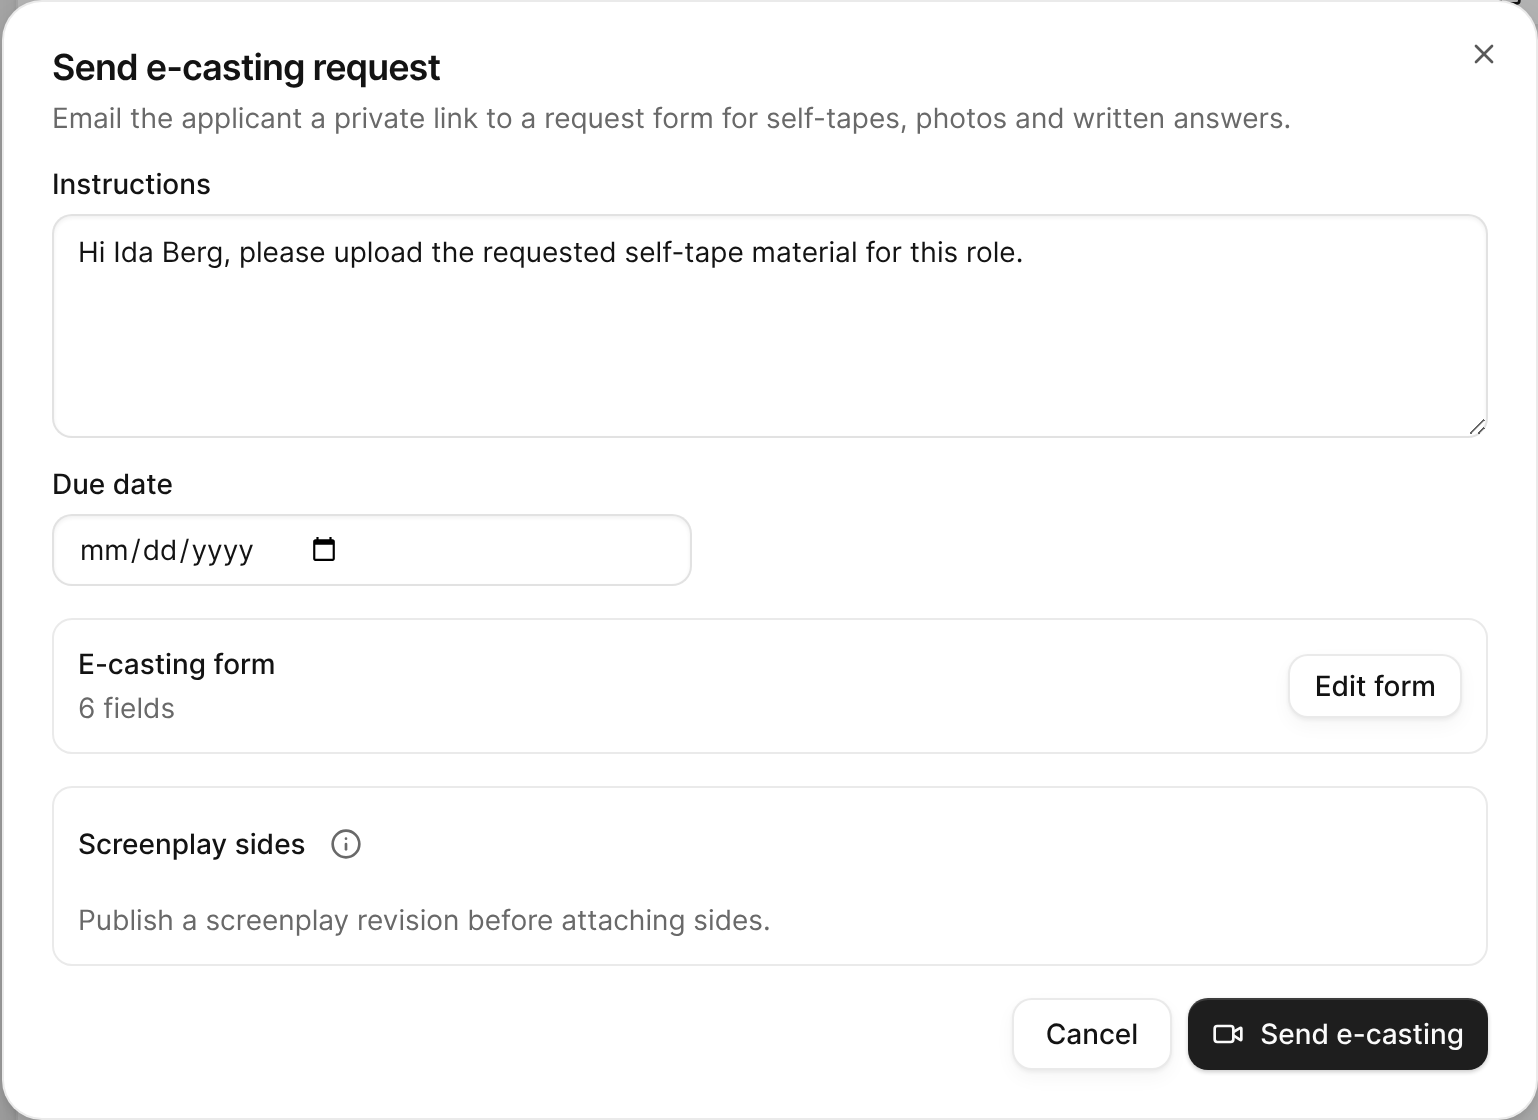
The Send e-casting request dialog with the personal message, due date, the role's e-casting form, and screenplay sides.
The E-casting form shows how many fields the role's form has. To change the form first, click Edit form. - To attach sides, choose a Published revision under Screenplay sides, then select the scenes the applicant should perform.
If you don't select any scenes, the whole revision is attached. Sides always come from a published revision, so the applicant never sees your working script. See Publish and distribute documents. - Click .
FilmKit emails the applicant a private link, and the applicant's status changes to E-casting requested.

The applicant's row shows the request's progress: Sent, Opened, Submitted, or Reviewed, with the due date and the number of sides.
Resend or cancel a request
In the applicant's row, do one of the following:
- Send a new request: Click Send again, adjust the request, then click Send e-casting. The new request uses the role's current form.
- Cancel the request: Click Revoke, then confirm. The upload link stops working.
Review a self-tape
When the applicant submits their self-tape, a Review button appears in their row.
- In the applicant's row, click .
- In the self-tapes dialog, read the applicant's Answers, watch the videos, and open the photos.
- For any item, give a star rating, enter a note under Feedback, then click Save feedback.
- Click Mark reviewed.
The request's status changes to Reviewed.
When you accept the applicant, their answers to fields linked under Save to contact are copied to their new contact.
What the applicant sees
The applicant opens the link from the email. They don't need a FilmKit account. The page shows your instructions, the due date, the sides to download, and your form in the order you built it. They type their answers, and for each photo or video they click Upload photo or Upload video, or, in a browser that supports it, Capture photo or Record video to use their camera. Their answers are saved as they go. They can submit only when every required field is complete; then they click Mark submitted. After that, they can't change their answers.
Applicants with a FilmKit account also find their requests under My E-Casting Requests. See Find and apply for roles.